Your Stikis Page
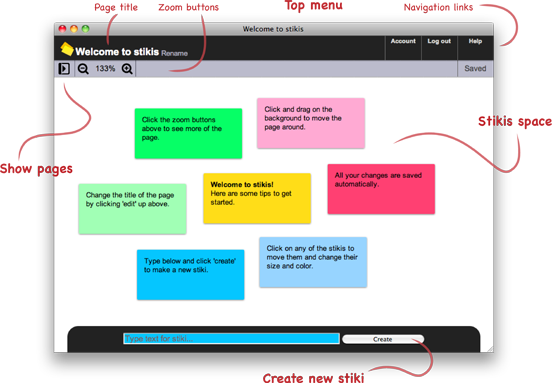
Your stikis page is where you can see and work with all your stikis. When you first sign up for stikis.com, you will be given a welcome page with a few stikis help get you started. It should look like this (click for a bigger version).
At the top of a page, there is a black strip with the title of the page on the left side and some nagivation links on the right. The navigation links allow you to see your Account details, Log out" of the site, and get help for the page (where you are now).
Beneath this, a grey stripe with some buttons for the page. On the left is a button that will show the pages pane, which lets you see and manage your stiki pages. There are also buttons for zooming in and out on the page.
Work with your stikis
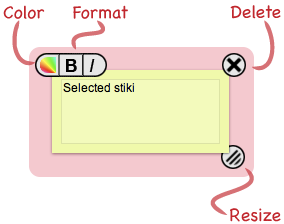
The colorful squares in the middle of the page are your stikis. You can click these and move them around. When you click a stiki, it will be selected and some buttons will also appear that let you change the size, color and text formatting. There is also a button with a cross that you can use to delete the stiki. The picture below shows a selected stiki with these buttons visible.
To change the text of the stiki, just click and type inside it.
Tip: You can use standard keyboard shortcuts for text editing. Press CTL-B or CTL-I to make text bold or italic. Press CTL-X, CTL-C and CTL-V to cut, copy and paste text. (Use the command key on OSX).
Create a new stiki
At the bottom of the page is a text box and a button where you can create new stikis. To do this, type the text for your new stiki in the box and click the ‘create’ button. A new stiki will appear in the middle of the screen. The color of the text-box will change to match any stiki that you select and it will give this color to new stikis that you create.

Tip: You can also create new stikis by double-clicking anywhere on the background of the page.
Select multiple stikis
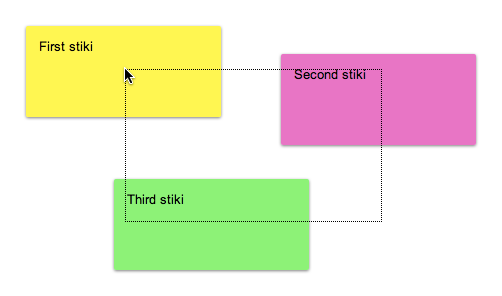
You can select more than one stiki at a time by holding down the CTL key (or Command key on OSX) and drawing a square around all the stikis you want to select, as shown in the picture below.
Tip: You can also hold down the CTL key (Command key on OSX) and click extra stikis one by one to add stikis to the current selection (or remove them if they are already selected).
Move and zoom the page
You can click and drag anywhere on the white background of the page to move it around.
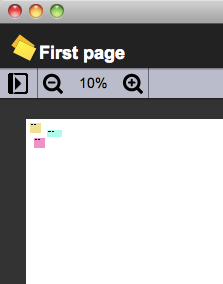
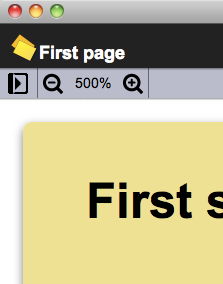
You can also zoom in and out of the page by clicking the zoom buttons at the top of the page or by scrolling with your mousewheel on the area you want to zoom in to. The picture below shows the page at different zoom levels.
 |
 |
Tip: There is also a keyboard shortcut for moving the page. Press the Shift key followed by an arrow key to move the page up, down, left or right.
See your other pages
On the left side of the screen, you can open a pane to show a list of all your
stikis pages. Do this by clicking on the ‘show pages’ button.
(![]() ).
Click the button again to hide the pages pane. The picture below shows this pane
with its different parts labelled.
).
Click the button again to hide the pages pane. The picture below shows this pane
with its different parts labelled.
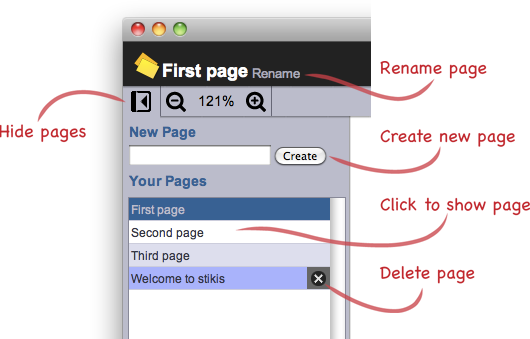
To change the title of the page, click the ‘Rename’ link. You will be able to change the title and save it.
To create a new page, type the title for your new page in the text box and click the ‘Create’ button. The new page will load in the main part of the screen.
You can click on the title of any of your other pages to load that one.
When you hover over the link to a page, a button with a cross on it will appear. You can click on this cross to delete the page.
Further help
If you need help with something else, try the list of related help topics up at the top of the page.
You can also email stikis help directly with your question.

